Sunday 28 September 2014

Fibre of the Month September - Short Fibre Merino Project

Although I have lots of batts left.. I also came back from the Lizard workshop with a fair sized bag of wet bits.. pieces that I had pulled off from areas that had too much fibre (from fluffy roots being too long or in places where folding over rays would of overlapped and needed thinning).  All the colours were in together in a soggy, soapy mass.. so I rinsed them and dried them and put them aside for later use.

I decided to use them for this project.. a wallet style purse for me.  First step was to card the fibre into a variegated batt.

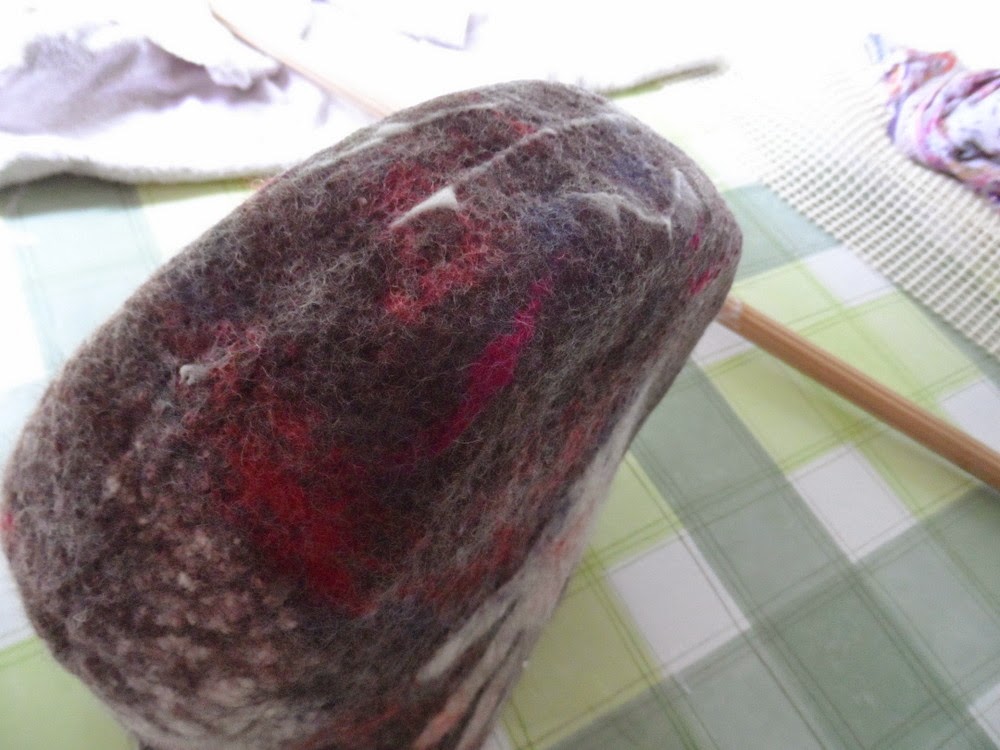
All my lizard colours mixed up together..
a purple base with flecks of red and green and occasional bits of silk
I wanted a wallet, with zipped coin area and a couple of pockets for keeping cards safe.  I decided to go for 3 sections which would fold up.

I cut paper to size and laid it beneath my bubble wrap as a guide for laying out
Added a resist for what would become the coin area
Folded rays over, then enclosed the resist as usual
On the middle section I enclosed smaller resists which would
become card holders
I flipped it over and added the outer decoration:
slubby red yarn and a rather rainbow-ish corner.


I wanted to hint at the Hundertwasser inspired spiral bag I use every day
and plan to keep this purse in
Part way through
Cutting the felt to remove resists.
Actually I left the smaller resists in place as long as possible
to prevent them from closing up
Finished felting.. inside
outside
I made folds where I wanted them and left it to dry
Then hand stitched a nice red zip in place over the coin pouch
My finished purse :)
I love this slightly squashed vintage brass shank button closure (which came from Hungary).  The loop is several strands of cotton thread with tight buttonhole stitch over.
Beading and simple embroidery finishing touches
Showing the card holder section
and finished outside
****************************************************************
For comparison to sampling data

Layout size: 47cm x 20.5cm
Finished size: 34cm x 15cm

Shrinkage: 27.5% x 26.5%
****************************************************************

This actually shrunk less than the sample even though I worked it hard.. guess I needed more hot water and elbow grease.. though it would of been too stiff if I had done that and probably wouldn't of bent.  

** Note: I know that the shrinkage of my lizard was about the same as with the sample (I don't have my starting measurement to be exact). The smaller amount of shrinkage on this purse is because I stopped when it seemed that to work it more would render it too stiff to bend - I probably needed a finer layout to felt to maximum shrinkage.. then my sizing would of been better too**

Anyway as a result it is a bigger, slightly more cumbersome purse than I had planned.. but I like it well enough and it was a good use for what had essentially been waste fibre.

I had a comment from Pat on the previous post, she mentioned how good short fibre merino is for felting cords..  I found this too when making my lizards tail. It felts quickly and easily into a strong cord which has a really nice feel.. with a different character and nicer than cords felted from long fibre merino.

Friday 26 September 2014

Fibre of the Month September - Short Fibre Merino

Wow time is really running away from me at the moment!  I can't believe September is nearly over!  I am just in time..

I used short fibre merino for Judit Poc's Lizard workshop a couple months ago.. that was the first time I'd ever used it and I was curious to see how it would be different from 'normal' merino.  I'm pretty sure other people must be curious about it too so decided to use it as a Fibre of the Month.

Image from World Federation of Merino Breeders

I brought my short fibre merino batts from Norwegian Wool.  They have a good choice of colours and provided absolutely excellent (very friendly) service. Maggy also kindly provided me with plenty of information about the fibre which I am going to summarise here.

The Merino sheep originally comes from Spain, where records first show it being traded in 1307.The Merino sheep is an excellent forager and very adaptable and was closely guarded for its superior quality. Before the 18th century the export of Merino Sheep from Spain was punishable by death.

The Merino stocked at Norwegian Wool comes from South Africa, where they are reared for both their meat and wool.  Merinos were first introduced to S.A. in 1789.  Wool sheep breeders in S.A. are well organised and have great regard for husbandry of their sheep and the environment.  Mulesing is not a widespread procedure as the South African Merino has been bred with less skin folds so there is less wool growth in the animal breech area. Many woolgrowers shear the breech area halfway through the growth cycle of the fleece. This is called ‘crutching’ and eliminates the moist woolly environment where blowfly can flourish.  The Merino stocked at Norwegian Wool is mulesing free.

Merino sheep need to be shorn at least once a year as their wool doesn't stop growing.  If allowed to grow unshorn it causes major health issues.  Many flocks are shorn 3 times every 2 years (approx every 8 months).

The wool is finely crimped and soft, typically 3-5 inches in length and very fine (12 to 24 microns).  The finest (and most valuable) wool comes from hogget's. According to my dictionary a hogget is a yearling sheep.. a lamb between weaning and first shearing.  A hogget fleece is the first time the animal has been shorn and has the softest, finest fleece the animal will ever produce.  Maggy's references: Wikipedia, www.nzMerino.co.nz, www.Merinosa.co.za, www.capewools.co.za and www.woolmark.com

Maggy and me both found it impossible to get a definitive answer as to WHY short fibre merino is shorter than the merino used for tops.. but it seems most likely that it is simply due to a shorter period of time passing between shearings resulting in shorter fibre.  If anybody knows more on this please comment..  we both found this lack of definite, clear information quite frustrating.

Sampling:
mmmm left a little too much fibre in those corners..
to be honest I wasn't thinking about them at all..

Laid the same as previous samples: 20cm x 20cm square, 3 layers.. and felted hard to achieve maximum shrinkage.

Observations:
This is 21 micron but if I'm totally honest feels coarser to me.. probably because it's shorter.  The staple length is approx 2" (5cm).
If you pull tuffs off and lay them down with ends overlapping (shingling) it takes a long time to lay out and is quite lofty, needing wetting down after each layer.  (for my project I re-carded it into variegated batts on my drum carder and was able to carefully peel nice even layers off to layout.. this was quicker and less pouffy.

Findings:
Finished sample size: 14cm x 13cm
Weight: 14.8g
Shrinkage: 30% x 35%

Short fibre Merino gives a firm felt which would be very good for structural pieces, hats and bags... (and I'm sure many, many other things :) this is just what I think I would use it for).

Next time: Short Fibre Merino Project

Saturday 13 September 2014

Hey Mister Tambourine Man..

I LOVE that song.. have done since I was a little girl :)  A couple months ago someone asked whether it would be possible to felt a tambourine bag.. and the idea really took hold, I just had to make one!  

And all the while Mr Tambourine Man was playing in my head :)

Pictures of hand print cave paintings & rough notes
I drew round and cut out my hand print.. then made some smaller ones
(reduced in size on a photocopier)
Carefully drew round these hand print templates onto white commercial prefelt
and cut them out
I made a block (the same size as a tambourine) from a couple of cake-boards
and Styrofoam and lots of tape.

I started off by covering the resist with white Falkland 
Then layers adding in brown merino..
and slubby red yarn on the final layer.

Total of 6 layers each side
Then the hand print and bits of red and dark blue merino scattered over to 
represent the speckles on the cave paintings
Starting side 2 design.. tiny hand prints
Part way through
Once the resist was removed I worked it really hard, throwing and pummelling

When it had shrunk down enough I put the block I'd made inside and worked the edges for ages
Rolling with my ridged stick really helped for this stage
I roughly stitched the opening closed over the resist
Worked 'till it really tightened it up as hard as possible

I removed the block while I was rinsing it, but put it back in so it would dry in the shape I wanted.
With handle sewn on
Drying
I made the handle from the same Falkland, merino and slubby yarn mix with the addition of some
lovely white Wensleydale curls at the ends.


I like the red and blue 'bits' scattered over
My hand print looks like a 10 year olds hand now :)
And these look like baby hands
I found a lovely strong zip for this bag.. it's hand stitched in
I don't have a photo of it with a tambourine yet.. but will have soon I hope.  I had borrowed one from a friend and she needed it back before I finished the bag.. as soon as I can I shall have to try the fit and take a photo.