Wednesday, 13 July 2011

Experimental Felting #2

Following on from yesterday, I promised to show you my latest bargain felting tool.. it may not be pretty, but my goodness does it do the job?!

Industrial painters roller tray £4 from B&Q, makes a fantastic alternative to a washerboard!

I have an Ashford wooden washerboard, which I rarely use (the woodgrain swole up on its first use making it far to rough to use without covering it in thick plastic first - a real pain).  Glass washerboards cost about £30, so this alternative is a real bargain.  The ridged part is at just the right angle, and the paint trough is perfect for dipping the felt in while you work - its a washerboard & mini sink all in one :).

I did find a few snaggy bits around the edge which I flattened by heating them briefly with a lighter flame and pressing flat with the back of a teaspoon.

Back to the nuno scarf.. 
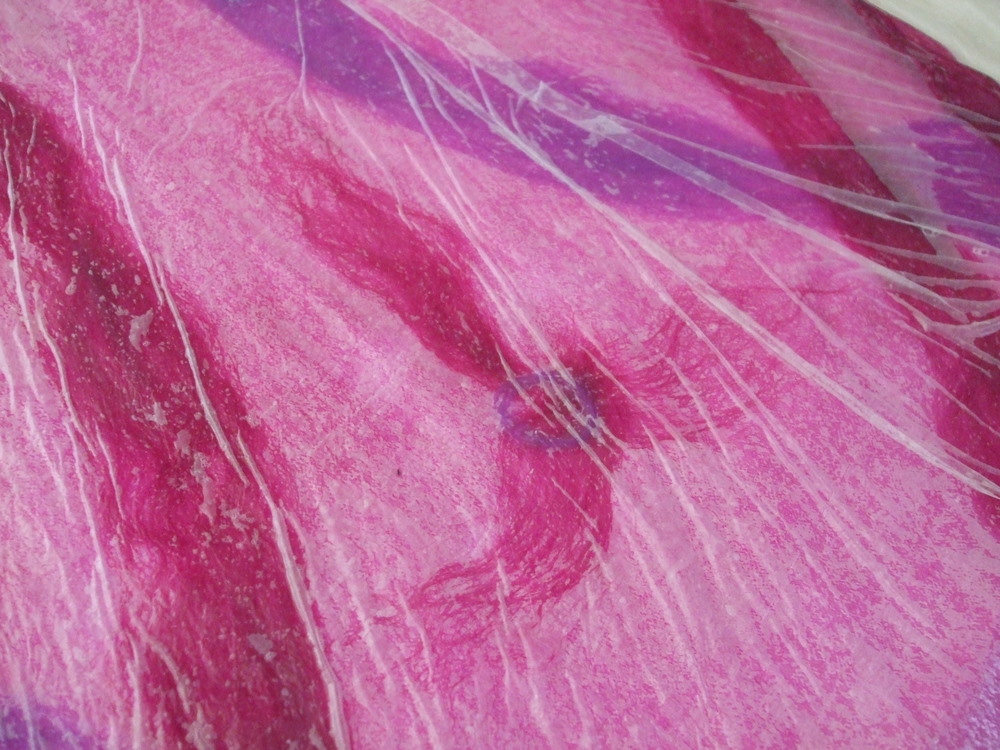
Once the fibres had migrated through the silk well I added heat, rolled it by hand for a while, then tossed it to get the lovely nuno texturing of the silk chiffon.

Stood on a towel it doesnt slide around while you rub.
I personally prefer it to a washerboard!
Once I was happy with the texture I ran it over my ridged roller-tray to really tighten up the felt.


All finished. 
When first laid out this measured 7feet x 45cm.. finished it measures 4.5feet x 20cm

This still took quite a few hours to make with the time spent laying out & finishing by hand (not counting drier time) using the tumble drier to replace most of the rolling made it physically a much easier job.  I dont plan to do any more nuno scarves in silk chiffon using this method..simply because I find that wool fibres travel through silk chiffon easily with the normal rolling method, and I like to use as little electricity as possible.

BUT...  my second experiment was with synthetic organza which takes forever for the fibres to catch hold of with the traditional rolling.  I have to say I was very suprised & thrilled to bits with this experiment; using the tumble drier the fibres worked through synthetic organza faster than they did the silk chiffon!

When it came out of the tumbler I treated my sample piece the same as the scarf above, heat + tossing then rubbing on ridged roller-tray.  I was left with a very pretty & sturdy piece of nuno.. that I just HAD to make something from

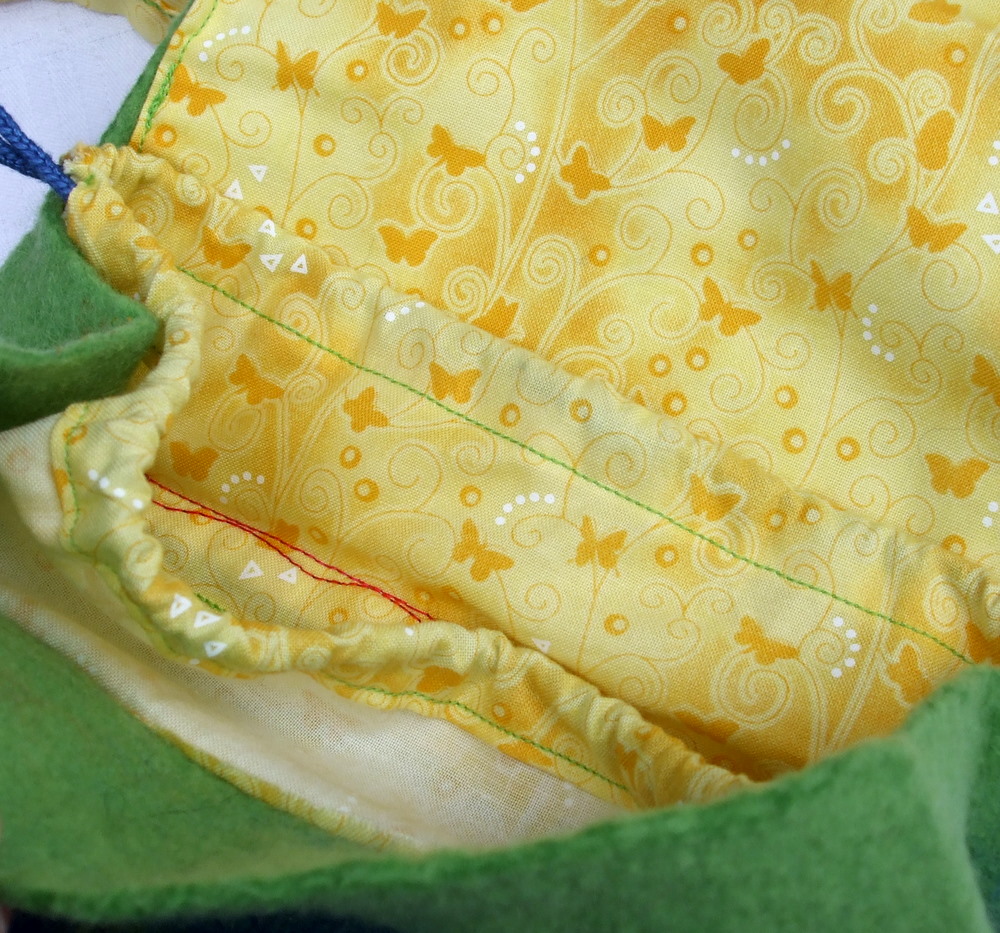
So, I machine stitched around the flower petals to define them and
turned it into a pretty & ethereal clutch bag


I have been BURSTING for weeks and weeks to do some freemotion embroidery onto my felt.  Actually, its been on my 'to do' list for about 3 years now..ever since I first saw Helen Melvins (Fiery Felts) landscapes.  I would love to go on a workshop with Helen..hopefully one day..

More recently RosiePink's beautiful wallhangings, and the adventures of many blog friends have rekindled the desire.  Just over a month ago I managed to find and order a freemotion foot to fit my machine.. it had to come from Texas USA to the UK, and unfortunately it still hasnt found its way here.  The seller is lovely though and has just refunded me.  I have now found the same foot in the UK and repurchased it (why couldnt I find it a month ago?!).. hope the postman doesnt lose this one.  Until it gets here I am making do with my normal open toe foot for my decorative stitching (my machine missed stitches without a foot).

After making this clutch I was left with a decent sized offcut.. so decided to play some more :)

Normal pin fastner sewn onto the back. 
I originally fancied this as a closure for a shawl..


..but it works much better as a companion for the clutch I think.
Next time.. my experiments got even BIGGER :)

TTFN xx

Tuesday, 12 July 2011

Experimental felting... #1

I have to confess to being extremely curious!  And just being told that something works is not enough for me.. I have to try it myself - cant settle till I have.  This has led to some funny situations in the past believe me..  This time my curiosity was piqued by reading about people using a tumble drier as a felting tool.  Not something I have ever done before..  The curiosity became unbearable when I heard about it being used to speed up nuno felting! 

... you may recall the large nuno shawls that I made earlier in the year - they took, what seemed, an eternity of rolling (many, many hours over 2 days) to get the fibres to migrate through the fabric.  I had no plans to felt any more of these shawls, even though I LOVE the way they turned out, because they took so darned long - and near killed my back!

Some experimentation was in order.. so I googled and found this excellent tutorial on Treetops Colour Harmonies website.. and followed it :)

For my first experiment I used silk chiffon to make a nuno scarf - using a lot less wool than I usually do:
Used a piece of the silk chiffon I dyed a couple of weeks ago

Didnt have a clear idea of the design when I started.. it just 'grew'.  I got quite carried away and spent 3 or 4 hours in a very zen like state laying out the pattern :) ..only realised how long I had taken because I got hungry - I was 1 1/2 hours late for a meal!

 
Wetted out with cold soapy water


Decorators plastic layed on top


Edges folded in to 'seal the parcel' and rolled around a damp towel

Dry towel rolled around the outside, then tied up nice and tight.

Then into the tumble drier it went - on a no-heat settling, for 15 minutes.  Then, like with normal felting, unroll & straighten, then re-roll from the opposite direction.  Back in the tumble drier for another 15 minutes.  This was repeated rolling from all 4 sides, though for the final 2 sides I only did 10 minute tumbles - this was plenty.

After all this bumping & tumbling the fibres had migrated through the silk beautifully.. and was ready for heat and throwing - this is the bit that I like.. the magic nuno moment when you get the lovely texture. 

I had also prepared a sample sized piece with synthetic organza to see how this behaved & tumbled it at the same time (this only took 3 tumbles!)

I am going to leave it there though for today.. Tomorow I shall show you how it turned out, what became of the synthetic sample piece AND my new bargain must have felting tool!

xx

Sunday, 3 July 2011

Hammered copper jewellery..

Had a nice couple of weeks.. Gary had some time off work and though he did 4 long hard days work at his moms house, we have had some nice days out together while the children were at school.  Between time spent with hubby & days at work I havent had any time for felting... I should get a couple of days this week though hopefully.. 

I have however had time to play around hammering copper!  I started tinkering with it because I seem to be getting a touch of arthritis in some of my fingers.. which I absolutely do not want.  SO I decided some copper jewellery was called for (I have heard that its good for curing/preventing arthritis).
I used one of the pretty shell buttons that I brought from the Button Lady at WonderWool Wales
Kept it nice and simple & rustic (bit like me lol).  It didnt take long for Rachael to ask me to make her a copper bracelet too (no suprises there :).  I decided to make a mother & daughter set using another of the pretty shell buttons, and take some photos as I did.

Jewellers pliers & flush cuts, hammer, 'anvil' (any strong smooth steel, mine is an old shoe last), 16 guage copper wire, thinner copper wire (I used the stuff out of electrical cable) & a pretty button

After measuring a length of wire (circumference of wrist plus a little extra for the loop & hook) I bent the loop about an inch from one end.  I used a slim pencil to go round.

Bend the neck of the loop back a little so it makes a nice round loop rather than a teardrop. 
Holding loop with one set of pliers & the short end with the others, wind the short bit tightly around the longer

Using flush cuts trim off the bit marked by pliers - this is excess anyway.
A quick squeeze with the pliers tucks it in nice and neat

Pop it on the 'anvil' and give it a good hammering. 
This strengthens the copper wire - suprising how warm it gets when you beat it.

Check the length - hammering stretches the wire.  Used flush cuts to trim it to length (remembering to allow extra to form the hook).  I filed the cut edge smooth and beat it again to flare it out a little.

Cut a piece of thinner copper wire - 4 or 5 inches.  I hammered just the very centre piece.  Then bent it around my pliers so it was the right shape to go through the button.

I twisted it at the back being careful not to damage the button.

Then bent it over the bracelet wire nice and tight & wrapped it around the back of the button again.  Used flush cuts to trim the ends, bent the ends in toward the centre of the wire 'nest' up close to the button.
I used my round nose pliers to make a tidy little hook. 

Ideally I would of hammered it on a bracelet mandrel, which would make it stronger... but as I dont have one I make do with whats available. I bent the bangle into shape around a small china vase :)  

My girlie is very happy with it.. she has just come down the stairs in her PJs (lazy Sunday morning) with it already on.

xx

Saturday, 25 June 2011

Progress photos - felting my wave

I usually get so caught up in my projects that I forget to take progress pics.. I am trying to remember though.  And I did take a few as I was laying out the wave panel in my recent cushion cover..
4 merino base layers
You cant tell from this photo (on my moniter you cant anyway!) but the base layers were all a deep Atlantic blue that I had dyed myself.  I used Landscape dye for this, now I have always found Landscapes to be very colour-fast - I like them.  But I wanted a very deep, dark blue so I used the full amount of dye for the dry-weight of fibre I was using.. to get the deepest colour possible from it.  Dont know quite what I did wrong (maybe should of cooked it a little longer?) even though I thought I'd rinsed the fibre well.. when I started felting with HOT water the blue ran! 

I liked it just like this..without doing anything else to it at all.
On the surface I used LOADS of white silk for the surf & spindrift; mawata silk hankies & caps, throwsters waste, and some bleeched linen fibres too. 

I added a some white merino to the mix too
So, with all this white detail, I started to panic a little when the blue started to run..  Nothing much to do really though at that point but keep going and see how it turns out.

Close up of what had been white surf. 
This photo catches the sheen of the silk quite well..
The colour run did lend a blue-hue to the white areas, but it was a happy accident - I really like it.  To me it looks like waves do in bright sunshine.. you know when they are sparkling so brightly that it almost hurts to look at them? 

I DID forget to take a photo of the finished panel BEFORE trimming and sewing
I trimmed the edges nice and square with my rotary cutter, and added a nice backing fabric with a double row of stitching around the edge.


So, now I really must try to remember to take more pics..  I do have one more recent (& as yet untold) project with lots of pics to share with you later in the week :)

TTFN xx 

Thursday, 23 June 2011

Going Coastal!

You an certainly tell that we have been to the seaside!  Look at whats happened to my work...
Only had 2 cushion pads when I took this :(
I had been planning to make some seaside inspired cushion covers, a trip to my local fabric shop presented me with the perfect backing fabric for them :)


If I had my dream cottage by the sea I would have things like this there...
I made a mess cutting the back of the first one - my brain was totally out of gear and I forgot to add the seam allowance!  Didnt want to waste the fabric though, so I have just finished making them into lavender sachets for my mother-in-law (she mentioned wanting some a few weeks ago).  She was born & raised in Cornwall and loves everything that reminds her of the sea, so I think she will be happy with these.
Different picture each side
Fishy keyrings were next on my list.  I find it hard thinking of anything 'blokey' to make from felt - I think these fit the bill quite nicely.  Pity I didnt get them done in time to go in my shop for Fathers Day!  Never mind theres always next year..
These are cut from super chunky Swaledale (spun by Clare) crocheted, I wove blue & green mohair through in places and then fulled in the washing machine.  Just right for these, its about 1cm thick and very sturdy.
And finally the yarn that I was spinning from the batts with banana fibre in..

I'm thinking of making myself a beaney hat from this.
Tuesday being the summer solstice we had planned to get up early and climb Clent hill to watch the sunrise.. didnt bother in the end though as it was pouring with rain on the night and promising to be a cloudy sunrise.  We got a little bit of sunlight through the day, then the cloud cover came back to hide the sunset.  Always feels like we should have a blazing bonfire, with music and dancing (and maybe jacket spuds!) to properly celebrate midsummer like our ancestors did.  Something else to do when we get a place with a little land!

Blogger is behaving EXTREMELY strangely lately, dont know if anyone else is experienceing this..  I'm having real trouble commenting on some blogs (which makes me wonde if people have trouble commenting on mine - I know it wouldnt even let me comment here a few weeks ago!).  Yesterday it wouldnt let me add any photos to this post, today it has...  And now the spacing has gone mental, I hit delete on one line and it deletes from the previous paragraph?!  Seriously weird.  Hope it resolves soon.

Hope you have a good rest of week & weekend :)
xx

Friday, 17 June 2011

Shearing time..

I just read this lovely post on one of the blogs that I follow, and really wanted to share it with you.

Jenny Holden keep a small flock of beautiful Shetland sheep, which she raises for their fleeces.  I have a real soft spot for Shetland sheep and their fleeces. This post is all about shearing her flock, which she does herself using old fashioned shears (not electric) its a very interesting read.  The following link will take you there..


I recon those fleeces would be amazing to work with!  My very first raw fleece was a Shetland (from Shetland, brought back by a friend) and was an absolute pleasure to clean, spin and felt with!  I LOVE a nice Shetland fleece!

Enjoy xx

Thursday, 16 June 2011

Double dyepots on the go!

Feels like I have been dyeing everything in sight the last couple of days :)
This is just todays dyeing...  
Norwegian wool tops & silk chiffon
I had a big wool order a couple of weeks ago, all undyed.  So last week I brought an Ashford chemical dye set - 12 colour pots, each one will dye a kilo to full strength. 

Yesterday and today have been my first 'go' with them - today I even found a second dyepot so I could get more done.  I have 2 kg of Norwegian tops and wanted quite a few strong colours, so I decided to dye up 100g of each colour.. decided not to bother yet with black & brown.  They are all strong, clear colours and I think I should manage to get quite a few shades by mixing, and making weaker dyepots too.  The only thing I have struggled with is my darned scales!  They are playing up and not reliably measuring the tiny quantities I needed.  Ashford dont give a teaspoon guide like some of the other dyes I have had (i.e. 1/2 tsp = 5g or whatever).  So I resorted to guessing & then weighing the pot to see how much it had gone down.  Turns out I'm a pretty good guesser :)

So now I've done 1100g of my Norwegian tops (they look like a super bright rainbow) and 4 meters of silk chiffon, in scarf length pieces.  I must admit I'm not keen on the smell though - glad I have finished for now!

I've just had a big order of sari silk fibres & silk scraps for my Folksy shop.  I quite enjoyed getting them sorted, weighed and packed over the weekend - Monday I got them into my shop.  its nice seeing them all in there, they look pretty :)
Unfortunately the photo doesnt do justice,
they looked so bright and pretty all lined up like this

I have also had my carder and spinning wheel out to play!  Carded up this batt with lots of banana silk fibre in it so I could take an example photo for the listing..
Sunrise? or sunset? 
cant quite decide which it reminds me of most..
ANd now I'm spinning it in bits and dabs, whenever I get 5 minutes of quiet time I spin a little more..

And now another week is almost over... another weekend nearly here - where does the time go?!
xx

Tuesday, 14 June 2011

Summer bag & purse

Just a quick post.. time is getting away from me again, can't believe its been a week since I posted our holiday pic!

 
Thought I'd tell you about my new bag..  I made it a couple of weeks ago actually, it came away with me and was very well used :)

For summer adventures I like a backpack type bag, to keep my hands free for whatever; scrambling over rockpools, helping kids and/or dogs.. you know how it is as a mom!  My trusty denim backpack (which I've used for about 8 years!) finally gave out a few weeks ago.  So I decided to make myself one..

Of course it HAD to be felt.. in 2 of my favourite coloured fibres.. with shiny, colourful decorative bits, and I decided to add some pretty cotton fabric my mom gave me too. 


I love these buttons for some reason...
I did take photos as I was making it but somehow managed to lose them! 

Basically I made a pretty long seamless bag, which was wider at one end (this is the bottom).  I'd used merino, so I felted it as hard as it would go - shrunk at least 40% & its lovely and pebbly now.  After cutting the flap I set aside the spare bit of felt till later.   I used pins and steam to set the folds in the sides.

The straps are sewn from the pretty cotton fabric, machine stitched into place.  I later hand stitched squares of felt over the top to look prettier & add a little more reinforcement to the area where the straps join the bag.

I wanted this bag to have a drawstring closure too, so out came the lucet..
Use thick blue crochet cotton to lucet a long cord. 
The nice thing with lucetted cord, it doesnt fray when you cut it to length.

I sewed a sleeve of cotton the same width as the bag top, with a channel running along the top for the cord to pass through - and stitched this into the bag an inch or so from the top.  I handstitched the closure loop in place then machined stitched the flap lining into placed, going over the loop as I did.

Unfortunately I did all three things without sitting back and just looking and evaluating what I'd done.  I sewed the sleeve in place the WRONG way round!  The back of the fabric is showing.  At the point when I noticed, too much would have to of been unpicked to take it off and turn it.. so for now I'm ignoring it.  I may try adding a piece of the pretty fabric over the white bit - well maybe, if I feel like it.. 

Luckily this bag is for me.. so I can ignore my mistake if I want to

The swirly pattern is made from the lovely bright pencil roving brought at Wonderwool,
there is loads of sari silk fibre too
I wanted a robust and functional purse, so decided to sew the zip into a cotton liner, then machine stitch the felt on.  I just love using this purse :) it feels nice in my hand.


The blue button is one that my lovely husband picked up off the floor when he was out walking - he knows that I have a thing for buttons & brought it home for me :)

Anyway, I'm off to make a cup of tea and find some lunch - just got back from work & I'm feeling pretty ravenous!

TTFN xx

Tuesday, 7 June 2011

A week of family fun...

As hoped last week was great!  We decided to weather-watch and go camping when the weather promised to be fine.. Late Monday afternoon we made the decision to go; spent a few manic hours collecting camping gear from various nooks & crannies, packing and preparing - Tuesday morning we were on the road bright and early.

We took a bit of a gamble and set out with no campsite booked, only to find that everyman and his dog had decided to go camping in Cornwall that week lol. We still had no real trouble finding a good place to stay, it just meant we were not as close to a beach as we like. Regardless of this we had a really fun break... We were based just outside St.Agnes, on the coastal path right by an old tin mine..

Along the coastal path heading back to our campsite (which was behind the tin mine)
 This is Wheel Coates tin mine, partially restored and very beautiful, perched on the slope heading down toward cliffs.

Just look at how TALL it is!  This doorway was already about 20feet up.

Lots of hidey holes and tiny gaps to squeeze through exploring

It was worth the squeeze and climb for this view though!
Thought this was quite interesting.  We saw lots of the medieval workings - you certainly wouldnt walk across the heather where you cant see whats beneath it!
We had 3 wildlife encounters - 2 of which were quite unexpected! 

We came across a beautiful little adder (snake) basking in the sun on the coastal path just about 300 yards past the tin mine.  Didnt have my camera to hand unfortunately, he was so pretty; about 18" long, shiny and with a clearly marked black zig-zag/diamond pattern down his back.  He gently wove his way into the undergrowth when we got to within a couple of feet from him, didnt seem all that bothered about us - it was lovely.  A lizard ran across a few minutes later but only Matt saw him (he was leading the way)... shows how quiet that stretch of coast is for them to be out in the open, they are usually pretty shy.
.
While brushing my teeth ready for bed on the first night I had a bit of a fright (nearly swallowed my toothbrush!!) when a bat crash landed in the sink I was using!  He must of chased a moth in through an open skylight.  Fortunately he found his way back out very quickly.
.
Our biggest wildlife treat however was planned.  We took a boat trip out of St.Ives to seal island and saw the seals lazing on the rocks there.. there were snowy white babies too :)

This is the boat we went on.. the Dolly Pentreath.  Shes a replica of a traditional St.Ives fishing boat. 
We had such fun see-sawing over the waves on the way out - it made my heart soar I LOVE it!  Rachael was less enthusiastic ("why is it moving so much?!" followed by lots of girly squeels) and turns out Amber is no sea-dog!  She would not settle till she was on Garys lap.  Though in fairness she was getting bounced around pretty well.. Jess had the good sense to lay down & go to sleep behind my feet.
Big baby!

It was funny watching them lift their heads & tails everytime a wave came along to keep them out of the water

Lying there like a sausage :)
We had a couple of lovely days on the beaches..

Thats my little man in the sand dunes - he didnt stay still long enough to get a closer picture! 
We visited Gwithian beach, Hayle for the first time - and what a beautiful beach it is!  You walk over lovely big sand dunes to get on the beach, which is 3 miles of soft golden sand, crashing Atlantic surf and dogs are allowed on all year round.  Its lovely and clean too - we will definately be going back there.  Infact we spotted a campsite nestled right at the foot of the dunes that we shall investigate further.
Favourite days!
I think they were pulling faces at me, but Im not really sure :)
And now life is back to normal.. kids at school, husband at work.  Yesterday was spent weighing fibre & dyeing, with a little bit of felting to finish off.  Today I was at Oak House (doing living history) taking on a role I rarely do; Mistress Jane - the la-di-daa lady of the house - a role I find rather tiring if Im honest.  Livened it up though with 1/4 of an hour of dancing to finish off.

Lots of felty plans for the rest of the week.

xx