Monday, 22 August 2011

New wall art.. and a week away

I just HAVE to show you this..
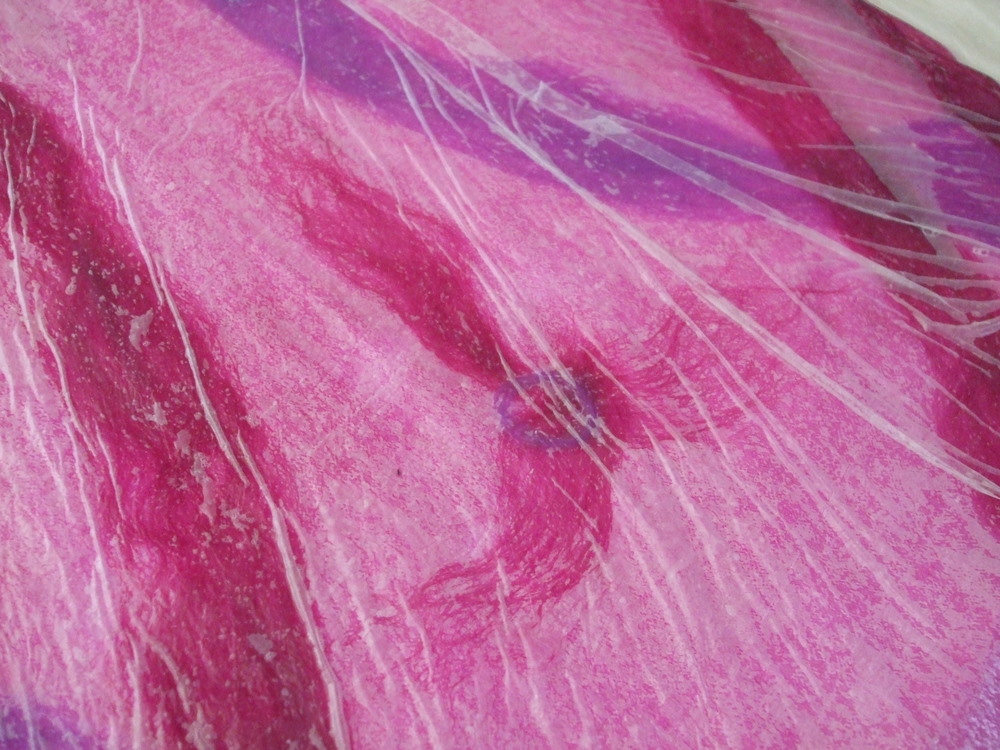
My son is 14 and about to start his GCSE subjects in September, one of the subjects he is dropping is art (OMG school with no art class would of been sheer purgatory for me!) as such he brought home a folder with all of the work he has done over the last 3 years.  When we were going through it my heart almost leapt out of my chest when I saw this.. I LOVE it!  It is now mounted and framed and hanging in pride of place in the hallway at the bottom of the stairs :)


'The Blue Ladies'
sorry about the glare across the glass.. really should of brought non-reflective

A3 size, worked in oil pastels.
I love this so much
I cant believe that his art teacher actually marked him down on this piece because he strayed from the red,orange, yellow tones.. isnt art about doing what feels right?  He is getting lots of positive comments from our friends and family who have seen, and I'm hoping this will boost his self confidence (which has been ground out in art class!) and inspire him to keep drawing & painting.

We have just spent a wonderful week camping and ocean kayaking in Cornwall :)  The weather was a bit dodgy, but my goodness did we have some fun!

Gary & Rachael on Daymer Bay
We camped right on the cliff overlooking Polzeath beach (a lovely place to camp).  Polzeath is a great surf beach! The first half of the week, while the weather was not so good, the waves were pretty big on Polzeath - too much for us with the kayak,  so we stayed on Daymer Bay just inside the Camel Estuary.. the water was calmer here.  When the weather changed for the better the sea calmed right down - the surfers were seriously unimpressed - and we could get out there!  So lovely kayaking up close to the sea birds bobbing around & diving, or nesting on the cliffs - they took no notice whatsoever.. if only I had a waterproof camera!  Here are a couple more pics anyway..
 
Polzeath looking out to Pentire Headland

Daymer Bay.. so peaceful
I had an awful head cold for the first few days (I'd had it a week before we went too).  It really fuzzed my poor brain up for a few days!  I did quite a few daft things - most noticable of which was my mishap with hair removal cream..  Night before we went I did my legs (as you do)   and didnt realise I had hair removal cream on the back of my hand when I put my hair up..  I didnt notice until I put my hair up the next day..  luckily its just a short chunk and not a bald patch that I'm left with - and I'm due a hair cut anyway. 

I also managed to fall in a humungous rock pool!  (Blame it on the head cold) Sods law it was on a cold day and we were on a nice long walk so I was all layered up; trousers, t-shirt, fleece, coat, scarf, backback..  I went in upto my armpits and soaked the lot - I've never been so unintentionally wet in all my life.  Amber was swimming across it at the time - she though I had come to join her lol.  It was funny though I must admit.  And it proved the water repellant qualities of felt too!  I had my phone and camera in my felt backpack - both were perfectly dry.

The kids just have 2 weeks of their summer holiday left now - where has the time gone?  Its flown by!

Hope you are all having a good summer too
xx

Thursday, 11 August 2011

Not many words today.. just a picture to share :)    My first wallhanging with a little freemotion embroidery on..  Its a reasonable sized wallhanging 22" x 24"  Inspired by photos taken on many wonderful walks along the North Cornwall coastline between Daymer Bay & Polzeath.

Hung from a nice bit of Dorset driftwood.. collected this piece in Feb 2010, it was just perfect for this hanging.

Just a little stitchery in the sea.. to define the horizon and some swirls in the sea. I needlefelted the sailing boat. Did think of hanging a couple of Cornish seashells from the end of the driftwood.. may still add them.
Freemotion grasses

And a freemotion seagull flying high
 My next wallhanging has a LOT more stitching on it :)

Have a good week folks - hope you are enjoying the summer xx

Sunday, 31 July 2011

Experimental Felting #3 Going BIGGER

Firstly apologies about any odd spacing in this post, or html type rubbish - blogger is having a mad one and after about 1/2 hour trying to get this look right - I'm giving up and going to cook dinner!

Its been a while.. but continuing the story of my experementation using the tumble drier as a tool to make nuno felting less back breaking..

My most exciting discovery was how brilliantly it worked nuno felting onto synthetic organza!  After the smaller sample piece I jumped right into felting a shawl...
Started by carding some lovely batts.. you cant really see it but theres loads of silk and a good sprinkling of firestar twinkling away in this :)

I laid it out on the floor 'cos it was 3m x 1 m..
Piece of plastic sheeting allowed me to add extra bits for the collar and bottom fringe detail (which I cut out part way through)
<>  
Plastic wrapped & rolled in an old towel - tied up nice and secure. 
 I chucked it in the tumble drier on no-heat for 20 minutes
<>  
After 20 minutes you can already see the organza starting to pucker.  Wrapped & rolled it up & put it in for another tumble
You can see  how well the fibres have come through the organza here - worked a treat!
This was after 50 to 60 minutes tumbling - which is all it took
Just to make doubly sure that the fibres were evenly through I gently ran a rubber-gloved hand over the organza side (this helps the fibres through)

Now it was time to get physical :) Heat, vigorous rolling & throwing you name it - I did it.  To finish I ran the wool side over my well soaped ridged plastic roller tray - this tightens the felt up nicely.
<>  
Finished!

My dear friend & fellow Woolgatherer Brenda found me a torso for displaying shawls on :)  Isnt she a treasure?! 
So there you go thats my final 'Experimental Felting' post ..... until the next time I get curious
xx

Thursday, 21 July 2011

Freemotion..

I mentioned that my (long anticipated) freemotion embroidery foot arrived last week :)  I could not wait to try it out!!  After doodling on the kids old school shirts that were destined for the rag-bag, I jumped in to my first little project.  This has been brewing in my mind for a while..  Finally got it out on Sunday :)

I think this might be classed as mixed-media? :)

I cut out a wave shape from cotton fabric - 2 different patterned pieces of fabric (can you see them?)  I used one for the main part of the wave and another for the curling under-part of the wave. 

I positioned the wave on my piece of felt, covered it all with a piece of blue organza and stitched around the outside of the wave.  Then I sniped around the outside of the stitches to remove the excess organza.. and started doodling :)  I covered the raw edges of the organza with tiny swirly movements... indicated movement with lines of stitching... added surf with white cotton thread... tiny little bit of metalic thread for sparkle on top of the wave.

Next I handstitched it to a slightly bigger piece of felt, and added a row of glass seed beeds to the edges of both felt pieces.  Pin back sewn on and a scrap of felt to cover the metal bar.  For fun I embroidered my initials on the back.. then kicked myself because I could of signed it with machine embroidery! lol.. 

I'm happy :)
brooch measures 6cm x 4cm (2.5" x 1.5")

So, there you go.. my first freemotion.. mixed media :) adventure with my new foot! 

Tuesday, 19 July 2011

Woolgatherers meeting and challenge #3

I'm a little late posting this.. been busy as ever!  Just over a week ago the Woolgatherers met, at Clares new home (thank you for hosting Clare :) ).  We had a lovely morning filled with the usual drooling over fibre.. eating cake.. drinking tea.. (and baby cuddling!)

Sue was unable to join us, and I know that she has felted some flowers for the challenge.. but for now here are the others :)

Challenge #3
' Flowers'
set by Brenda

On the spinning wheel is Clare's challenge piece; thinking laterally about the theme she brought nettle fibre & bamboo fibre to spin.
The beautiful pink flower is Brenda's beaded brooch.
I felted 2 seamless cushions.. which I'm planning to post about soon (guess what - I took process pics :)

Our 4th challenge theme is 'Holidays'.  We are set to meet next right in the middle of the holiday season - Fri 5th August .. anybody in the Birmingham, Worcester, Kidderminster area.. if you fancy coming along give me a shout, we would LOVE to meet you!

I made out like a bandit from the meeting.. Clare gave me a big green wool blanket to do 'as I please' with :)  Great news for me.. I'm planning to make a woolen coat for myself this winter - and I LIKE green.  Brenda has lent me a lovely (and what looks simple) pattern. 
Blanket behind.  I want to make the short green coat
Brenda has also, very kindly, given me a large microwave oven to do my dyeing in! How great is that?! Its living out in the garage too, so my family will be spared the smell in the house lol. 

Funnily enough they don't actually complain about the smell.. possibly because they know I can do MUCH worse things with a microwave :D - like the time I microwaved TRIPE  for Jesse (our oldest dog).  It wasn't long after we had her & she had been raised on tripe.. I had to ween her off it - the smell made me retch.. and this was the only time I gave her cooked tripe!  OMG worst smell I think I've ever come across.. The children were about 5 & 7.. they ran down the garden and wouldnt come back in for 2 hours!  Apart from the smell, it was pretty hilarious.  To add to the farce, our next door neighbour chose that day to lock himself out and ask to come through our house to climb the fence - I dread to think what he thought - it stunk to high heaven! 

And now the kids are just about ready to break up for the summer holidays!  I'm felting like a mad woman trying to get as much done as possible this week..  I have a few projects planned for the holidays.

I have been enjoying my new freemotion embroidery foot on the sewing machine :) and have got a thing or 2 to share with you over the next little while.

xx

Wednesday, 13 July 2011

Experimental Felting #2

Following on from yesterday, I promised to show you my latest bargain felting tool.. it may not be pretty, but my goodness does it do the job?!

Industrial painters roller tray £4 from B&Q, makes a fantastic alternative to a washerboard!

I have an Ashford wooden washerboard, which I rarely use (the woodgrain swole up on its first use making it far to rough to use without covering it in thick plastic first - a real pain).  Glass washerboards cost about £30, so this alternative is a real bargain.  The ridged part is at just the right angle, and the paint trough is perfect for dipping the felt in while you work - its a washerboard & mini sink all in one :).

I did find a few snaggy bits around the edge which I flattened by heating them briefly with a lighter flame and pressing flat with the back of a teaspoon.

Back to the nuno scarf.. 
Once the fibres had migrated through the silk well I added heat, rolled it by hand for a while, then tossed it to get the lovely nuno texturing of the silk chiffon.

Stood on a towel it doesnt slide around while you rub.
I personally prefer it to a washerboard!
Once I was happy with the texture I ran it over my ridged roller-tray to really tighten up the felt.


All finished. 
When first laid out this measured 7feet x 45cm.. finished it measures 4.5feet x 20cm

This still took quite a few hours to make with the time spent laying out & finishing by hand (not counting drier time) using the tumble drier to replace most of the rolling made it physically a much easier job.  I dont plan to do any more nuno scarves in silk chiffon using this method..simply because I find that wool fibres travel through silk chiffon easily with the normal rolling method, and I like to use as little electricity as possible.

BUT...  my second experiment was with synthetic organza which takes forever for the fibres to catch hold of with the traditional rolling.  I have to say I was very suprised & thrilled to bits with this experiment; using the tumble drier the fibres worked through synthetic organza faster than they did the silk chiffon!

When it came out of the tumbler I treated my sample piece the same as the scarf above, heat + tossing then rubbing on ridged roller-tray.  I was left with a very pretty & sturdy piece of nuno.. that I just HAD to make something from

So, I machine stitched around the flower petals to define them and
turned it into a pretty & ethereal clutch bag


I have been BURSTING for weeks and weeks to do some freemotion embroidery onto my felt.  Actually, its been on my 'to do' list for about 3 years now..ever since I first saw Helen Melvins (Fiery Felts) landscapes.  I would love to go on a workshop with Helen..hopefully one day..

More recently RosiePink's beautiful wallhangings, and the adventures of many blog friends have rekindled the desire.  Just over a month ago I managed to find and order a freemotion foot to fit my machine.. it had to come from Texas USA to the UK, and unfortunately it still hasnt found its way here.  The seller is lovely though and has just refunded me.  I have now found the same foot in the UK and repurchased it (why couldnt I find it a month ago?!).. hope the postman doesnt lose this one.  Until it gets here I am making do with my normal open toe foot for my decorative stitching (my machine missed stitches without a foot).

After making this clutch I was left with a decent sized offcut.. so decided to play some more :)

Normal pin fastner sewn onto the back. 
I originally fancied this as a closure for a shawl..


..but it works much better as a companion for the clutch I think.
Next time.. my experiments got even BIGGER :)

TTFN xx

Tuesday, 12 July 2011

Experimental felting... #1

I have to confess to being extremely curious!  And just being told that something works is not enough for me.. I have to try it myself - cant settle till I have.  This has led to some funny situations in the past believe me..  This time my curiosity was piqued by reading about people using a tumble drier as a felting tool.  Not something I have ever done before..  The curiosity became unbearable when I heard about it being used to speed up nuno felting! 

... you may recall the large nuno shawls that I made earlier in the year - they took, what seemed, an eternity of rolling (many, many hours over 2 days) to get the fibres to migrate through the fabric.  I had no plans to felt any more of these shawls, even though I LOVE the way they turned out, because they took so darned long - and near killed my back!

Some experimentation was in order.. so I googled and found this excellent tutorial on Treetops Colour Harmonies website.. and followed it :)

For my first experiment I used silk chiffon to make a nuno scarf - using a lot less wool than I usually do:
Used a piece of the silk chiffon I dyed a couple of weeks ago

Didnt have a clear idea of the design when I started.. it just 'grew'.  I got quite carried away and spent 3 or 4 hours in a very zen like state laying out the pattern :) ..only realised how long I had taken because I got hungry - I was 1 1/2 hours late for a meal!

 
Wetted out with cold soapy water


Decorators plastic layed on top


Edges folded in to 'seal the parcel' and rolled around a damp towel

Dry towel rolled around the outside, then tied up nice and tight.

Then into the tumble drier it went - on a no-heat settling, for 15 minutes.  Then, like with normal felting, unroll & straighten, then re-roll from the opposite direction.  Back in the tumble drier for another 15 minutes.  This was repeated rolling from all 4 sides, though for the final 2 sides I only did 10 minute tumbles - this was plenty.

After all this bumping & tumbling the fibres had migrated through the silk beautifully.. and was ready for heat and throwing - this is the bit that I like.. the magic nuno moment when you get the lovely texture. 

I had also prepared a sample sized piece with synthetic organza to see how this behaved & tumbled it at the same time (this only took 3 tumbles!)

I am going to leave it there though for today.. Tomorow I shall show you how it turned out, what became of the synthetic sample piece AND my new bargain must have felting tool!

xx

Sunday, 3 July 2011

Hammered copper jewellery..

Had a nice couple of weeks.. Gary had some time off work and though he did 4 long hard days work at his moms house, we have had some nice days out together while the children were at school.  Between time spent with hubby & days at work I havent had any time for felting... I should get a couple of days this week though hopefully.. 

I have however had time to play around hammering copper!  I started tinkering with it because I seem to be getting a touch of arthritis in some of my fingers.. which I absolutely do not want.  SO I decided some copper jewellery was called for (I have heard that its good for curing/preventing arthritis).
I used one of the pretty shell buttons that I brought from the Button Lady at WonderWool Wales
Kept it nice and simple & rustic (bit like me lol).  It didnt take long for Rachael to ask me to make her a copper bracelet too (no suprises there :).  I decided to make a mother & daughter set using another of the pretty shell buttons, and take some photos as I did.

Jewellers pliers & flush cuts, hammer, 'anvil' (any strong smooth steel, mine is an old shoe last), 16 guage copper wire, thinner copper wire (I used the stuff out of electrical cable) & a pretty button

After measuring a length of wire (circumference of wrist plus a little extra for the loop & hook) I bent the loop about an inch from one end.  I used a slim pencil to go round.

Bend the neck of the loop back a little so it makes a nice round loop rather than a teardrop. 
Holding loop with one set of pliers & the short end with the others, wind the short bit tightly around the longer

Using flush cuts trim off the bit marked by pliers - this is excess anyway.
A quick squeeze with the pliers tucks it in nice and neat

Pop it on the 'anvil' and give it a good hammering. 
This strengthens the copper wire - suprising how warm it gets when you beat it.

Check the length - hammering stretches the wire.  Used flush cuts to trim it to length (remembering to allow extra to form the hook).  I filed the cut edge smooth and beat it again to flare it out a little.

Cut a piece of thinner copper wire - 4 or 5 inches.  I hammered just the very centre piece.  Then bent it around my pliers so it was the right shape to go through the button.

I twisted it at the back being careful not to damage the button.

Then bent it over the bracelet wire nice and tight & wrapped it around the back of the button again.  Used flush cuts to trim the ends, bent the ends in toward the centre of the wire 'nest' up close to the button.
I used my round nose pliers to make a tidy little hook. 

Ideally I would of hammered it on a bracelet mandrel, which would make it stronger... but as I dont have one I make do with whats available. I bent the bangle into shape around a small china vase :)  

My girlie is very happy with it.. she has just come down the stairs in her PJs (lazy Sunday morning) with it already on.

xx

Saturday, 25 June 2011

Progress photos - felting my wave

I usually get so caught up in my projects that I forget to take progress pics.. I am trying to remember though.  And I did take a few as I was laying out the wave panel in my recent cushion cover..
4 merino base layers
You cant tell from this photo (on my moniter you cant anyway!) but the base layers were all a deep Atlantic blue that I had dyed myself.  I used Landscape dye for this, now I have always found Landscapes to be very colour-fast - I like them.  But I wanted a very deep, dark blue so I used the full amount of dye for the dry-weight of fibre I was using.. to get the deepest colour possible from it.  Dont know quite what I did wrong (maybe should of cooked it a little longer?) even though I thought I'd rinsed the fibre well.. when I started felting with HOT water the blue ran! 

I liked it just like this..without doing anything else to it at all.
On the surface I used LOADS of white silk for the surf & spindrift; mawata silk hankies & caps, throwsters waste, and some bleeched linen fibres too. 

I added a some white merino to the mix too
So, with all this white detail, I started to panic a little when the blue started to run..  Nothing much to do really though at that point but keep going and see how it turns out.

Close up of what had been white surf. 
This photo catches the sheen of the silk quite well..
The colour run did lend a blue-hue to the white areas, but it was a happy accident - I really like it.  To me it looks like waves do in bright sunshine.. you know when they are sparkling so brightly that it almost hurts to look at them? 

I DID forget to take a photo of the finished panel BEFORE trimming and sewing
I trimmed the edges nice and square with my rotary cutter, and added a nice backing fabric with a double row of stitching around the edge.


So, now I really must try to remember to take more pics..  I do have one more recent (& as yet untold) project with lots of pics to share with you later in the week :)

TTFN xx